Edit: Scroll down for updates to this post
I found out recently that people are actually reading what I’ve been writing! Strange but true. (Thanks Jon!) To make things a bit simpler, I’m going to divide each section of work into it’s own blog. I want to try and summarize what I did, with some pictures, maybe videos, and also what tools and materials I used.
So yes, I have been working on the container. Everyone keeps asking when I’m starting. I have! I’ve just been working on the flooring inside.
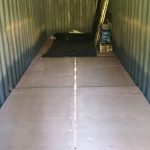
So we all know what the flooring in a container looks like. It is made up of plywood made from a very specific type of hardwood. This ply is also especially treated to prevent infestation and weathering. Considering my container is 18 years old, the floorboards are in very good condition. Unless they were replaced at some time, but I don’t think so.
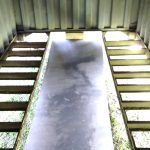
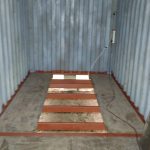
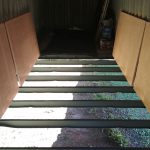
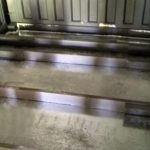
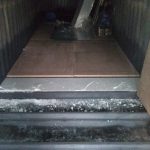
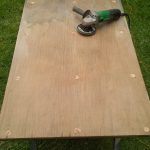
What does it look like once the floorboards are lifted?
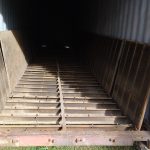
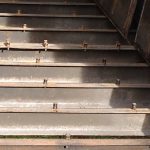
As you can see from the pictures, it’s pretty basic. Just a lot a of steel. Did a say “a lot?” The joists under the floor boards are spaced 300mm apart. But then the specs for the container are that it should be able to support a ton/m2. That’s way more than we need for a residence. So my plan was to remove every second one, and use that steel elsewhere.
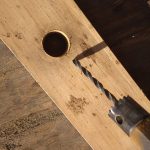
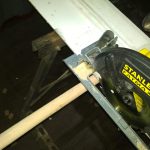
Removing the floorboards is no small operation. There are 362 screws holding them in place. And with screw heads that are stripped, damaged and not been replaced for 18 years, it really is a hard work. After a bit of Googling and YouTube videos, I found an idea from someone who used a holesaw to separate the screws from the wood. It leaves a neat hole that hopefully we can fill in with a dowel. It also leaves the screws still in the joist, which are easy to then grind off.
The trick with using the holesaw to remove the screws is to remove the mandrel (drill bit) that prevents the holesaw from jumping around when drilling. Obviously, it has to be removed because there is a screw where there would normally be wood. Instead, I made a guide block from a scrap piece of wood, and used this to prevent the holesaw from jumping around.
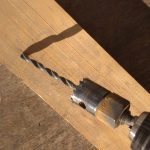
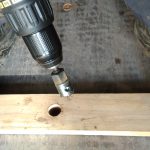
I found that drilling fairly quickly, with minimal pressure was the key. Slow speed required to much pressure to be applied and just overheated everything, which would cause the holesaw teeth to break more quickly. Also, a bit of side-to-side motion while drilling would make sure there was less friction and overheating. I did also try adding water as I drilled to cool things, but this just made matters way worse by creating a sticky paste, and also caused the wood to swell a bit resulting in more friction.
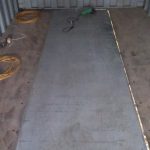
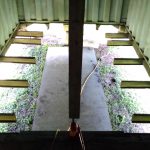
Removing the Gooseneck Plate
You’ll also notice in the pictures there is a gooseneck plate. Most 40′ containers have these. Apparently it’s for a special gooseneck trailer, that allows the container to be lower when transported by truck (apparently required in some European countries). Most trailers in South Africa are not gooseneck, so this steel plate is not really required. You guessed it…I’m going to get rid of that too.
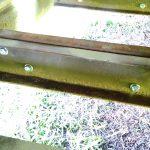
The problem with removing that massive steel plate is that the joists underneath it are all welded together, so removing the plate means removing the joists. But fortunately, we’ve got some extra joists that were removed from the front of the container. I took those and bolted them to the short joists left over after cutting out the plate.
08 April 2018 – Update on Preparing the Flooring
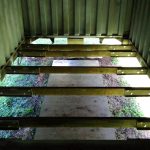
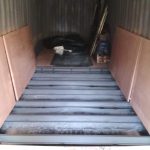
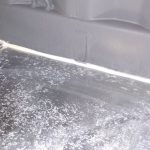
It’s been a while since my last update to the flooring. but I have managed to complete the cleaning and priming of the underfloor joists. You can see the process in the pictures.

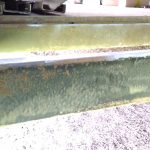
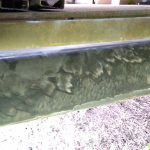

I’m really glad I took the time to clean up all the joists. A lot of them are bent underneath from the container being moved around, and most were obviously very scratched underneath. Where they are bent and scratched some rust had formed. Although the rust was not bad considering it’s age, I’ve made sure it’s going to last much longer now.
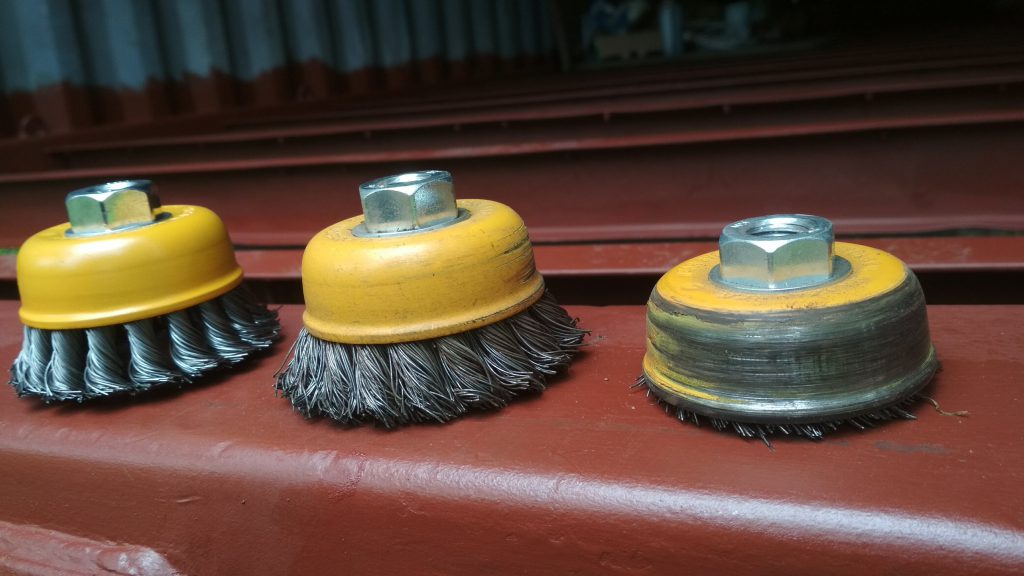
With all that cleaning I’ve been going through a couple of wire brushes…
05 August 2019 – Update on Preparing the Flooring
I can’t believe it’s been so long since I updated this post! But I’ve made some good progress on the flooring, and am nearly finished. Whew!
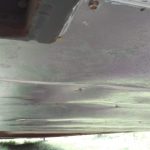
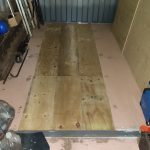
So after cutting out the unnecessary joists, and cleaning them, I sprayed them with the same paint I used for the exterior of the container just for some extra protection. Once the floorboards are down permanently there’s going to be no way to get at them again – well, it will be really difficult.
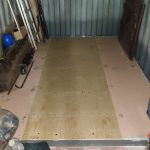
The first thing I did after spraying was to close in the space between the joists. I did this by screwing some galvanized sheeting from underneath and sealing all the edges and joins of the sheeting.
The next step was to fill the floor space between the joists with some insulation. I used recycled 110mm polystyrene. I found that polystyrene is not as soft as I thought it would be. The first lot of polystyrene I got I thought I’d make it 5mm bigger than what I needed, to make sure of a tight fit. But it was really a struggle to get it to fit in where I needed it. So my suggestion is to get the exact size you need.
After installing the insulation, it was time to get those boards screwed down for good, and then seal up the gaps.
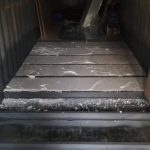
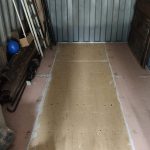
Prepping the Floor Boards of the Shipping Container
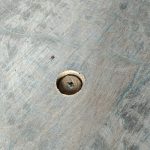
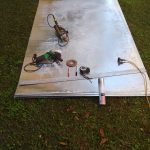
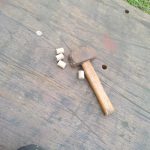
Earlier in this post I showed how I removed the floor boards. But once lifted, I wanted to get them cleaned up and painted with primer before putting them back. I also had to fill in the holes I had made while drilling around the screws.
As it turned out, the holesaw I had used is the same size as a wooden broom handle. So instead of buying expensive dowels, I was able to buy about five broom handles and cut them to the thickness of the floorboards. And that was my plug for the holes! Then just to sand them flush to the thickness of the floor board.
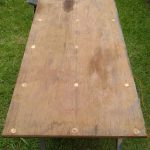
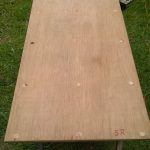
Last thing to do was just paint them with a wood primer. Later on once fitted, I will paint them with a floor paint, perhaps a polyurethane sealer. Eventually they’ll be covered with a wood laminate or tiles.
Replacing the Gooseneck Plate with Plywood
Earlier in the post I explained how I removed the gooseneck steel plate, so I had to replace that with some wood. I couldn’t find 28mm thick plywood anywhere. But I managed to find a place that sells pre-used timber and boards. I used 18mm and 9mm plywood boards to get the thickness I needed, cut it to size and screw it down. Then seal up the edges. Not such a big job.
Tools and Materials Required for the Flooring
- 1x Electric Drill – I tried using an 18v cordless drill. It just wasn’t powerful enough.
- 3x Holesaw – I used a 22mm wood and steel combination. It’s impossible to not hit the joist after drilling through the wood, so it must be a combination holesaw. I went through a few because the teeth caught on some of the screw heads or shaft, and also the joists wore it out.
- 1x Angle Grinder – I used a 115mm angle grinder because the larger 230mm grinder just did not fit in between the joists.
- 8x 115mm Grinding Discs – I used 2mm cutting discs to start with, but the thinner 1mm worked way better.
- 1x Scrap Wood – Used for the guide block. It can’t be too thin, mine was 20mm thick.
- 200x 50×5.5mm Tek Screws – Used to screw the floorboards back down. Tek screws have a self-drilling point so no pilot holes are required to drill through the wood or steel. However (!!), it’s not as easy as that. Without drilling a pilot hole, the thread going through the wood put such pressure on the screw drilling through the steel that it kept breaking the head off the screw. So I ended up, and I recommend drilling a 5mm hole through the wood, and a smaller pilot hole through the steel before putting the Tek screw.
- 1x 5mm wood drill bit – See Tek Screws above
- 1x 3.5mm steel drill bit – See Tek Screws above
- 12x 1225x2450mm Galvanized Sheeting – To close in the floor space from underneath the container.
- 200x 25×4.5mm Tek Screws – For attaching the galvanized sheeting under the container.
- Polystyrene cut to size – To fit between the galvanized sheeting and floorboards for insulation. There were different sizes, but mostly 2330x587x110mm.
- Spray Foam – I used spray foam to fill in any gaps that the polystyrene wouldn’t get into, for example the threshold plate under the doors had some odd shapes. It’s just impossible to get the polystyrene in there.
- Sika-Flex High Tack – I used this to seal the galvanized sheeting to the underside of the container. What I did is once I had screwed the sheeting in place, I loosened the screws (without taking them out) and squeezed in the adhesive between the sheeting and steel, then tightened the screws. I wanted to make sure there were absolutely no air gaps so creepy-crawlies can’t get in, and for more effective insulation.
- Acrylic Sealant – I used this just to seal around the edges of the floorboards once they were screwed down back in position. The original flooring had plastic around the edges of the floorboards (along the walls), which mostly just shattered when I had originally removed the floorboards. So the extra gap had to be filled in, and then also just where the floor boards met I sealed that too.
- Steel Primer Paint – Once the steel joists and bottom side rails were cleaned I sprayed them with an anti-rust steel primer.
- Wood Primer Paint – I used an oil-based pink wood primer to paint all the floorboards after I had cleaned them up.
- 12x Flap Discs – I don’t have a belt sander so I used the baby grinder with a flap disc (sanding disc). I’m going to be covering over the floorboards with a laminate or tiling, so I wasn’t too concerned with having a perfectly smooth finish.
- Broom Handles 🙂 – I hit a luck when the holes I had drilled around the original screws in the floorboard turned out to be the exact size of a wooden broom handle. So I just cut the broom handles up (30mm lengths) and hammered them into those holes. Perfect tight fit!! (See the gallery above)
- Extra Plywood – I had to get some extra plywood where the Gooseneck Plate had been. I found a place nearby who stock pre-used wood, for example pallets and crates, etc. They have a huge range of timber and boards so I’ll be using them in future. I couldn’t get the original 28mm thick boards, so I went with 18mm and 9mm boards.
Hi, i’m about to start my own container house project, I’m from Argentina btw. It’s a very interesting Blog!
I want to do a radiant floor heating system, and i’m thinking if it could be added on top of the wood that comes with the container and on top of that the floor.
How did you pop up the floor boards? I’ve seen people use a bottle jack but that is not an option for me since I have no access to the underside.
Thanks!
I did use a jack. I would suggest cutting a small square out of one of the boards with a jigsaw. Make it big enough to get a crowbar in. Once the board is out you can patch up the cutout from underneath, then just fill and sand.
Maybe you can do this near the wall – if you’re putting drywalling then most of the cutout square would be covered by the drywall.
Let me know how it goes!
Hi. Any idea yet what this will sell for once complete? I have recently started looking into buying a converted container as a garden cottage. Please send more info.
. Thank you! Megan